For the second project I tried to improve my Revit model, by implementing three new ideas using API programming.
My goal was to use CSharp to manipulate the parameters in the curtain panel, which I wasn't able to work with only using Revit. my three implementations are :
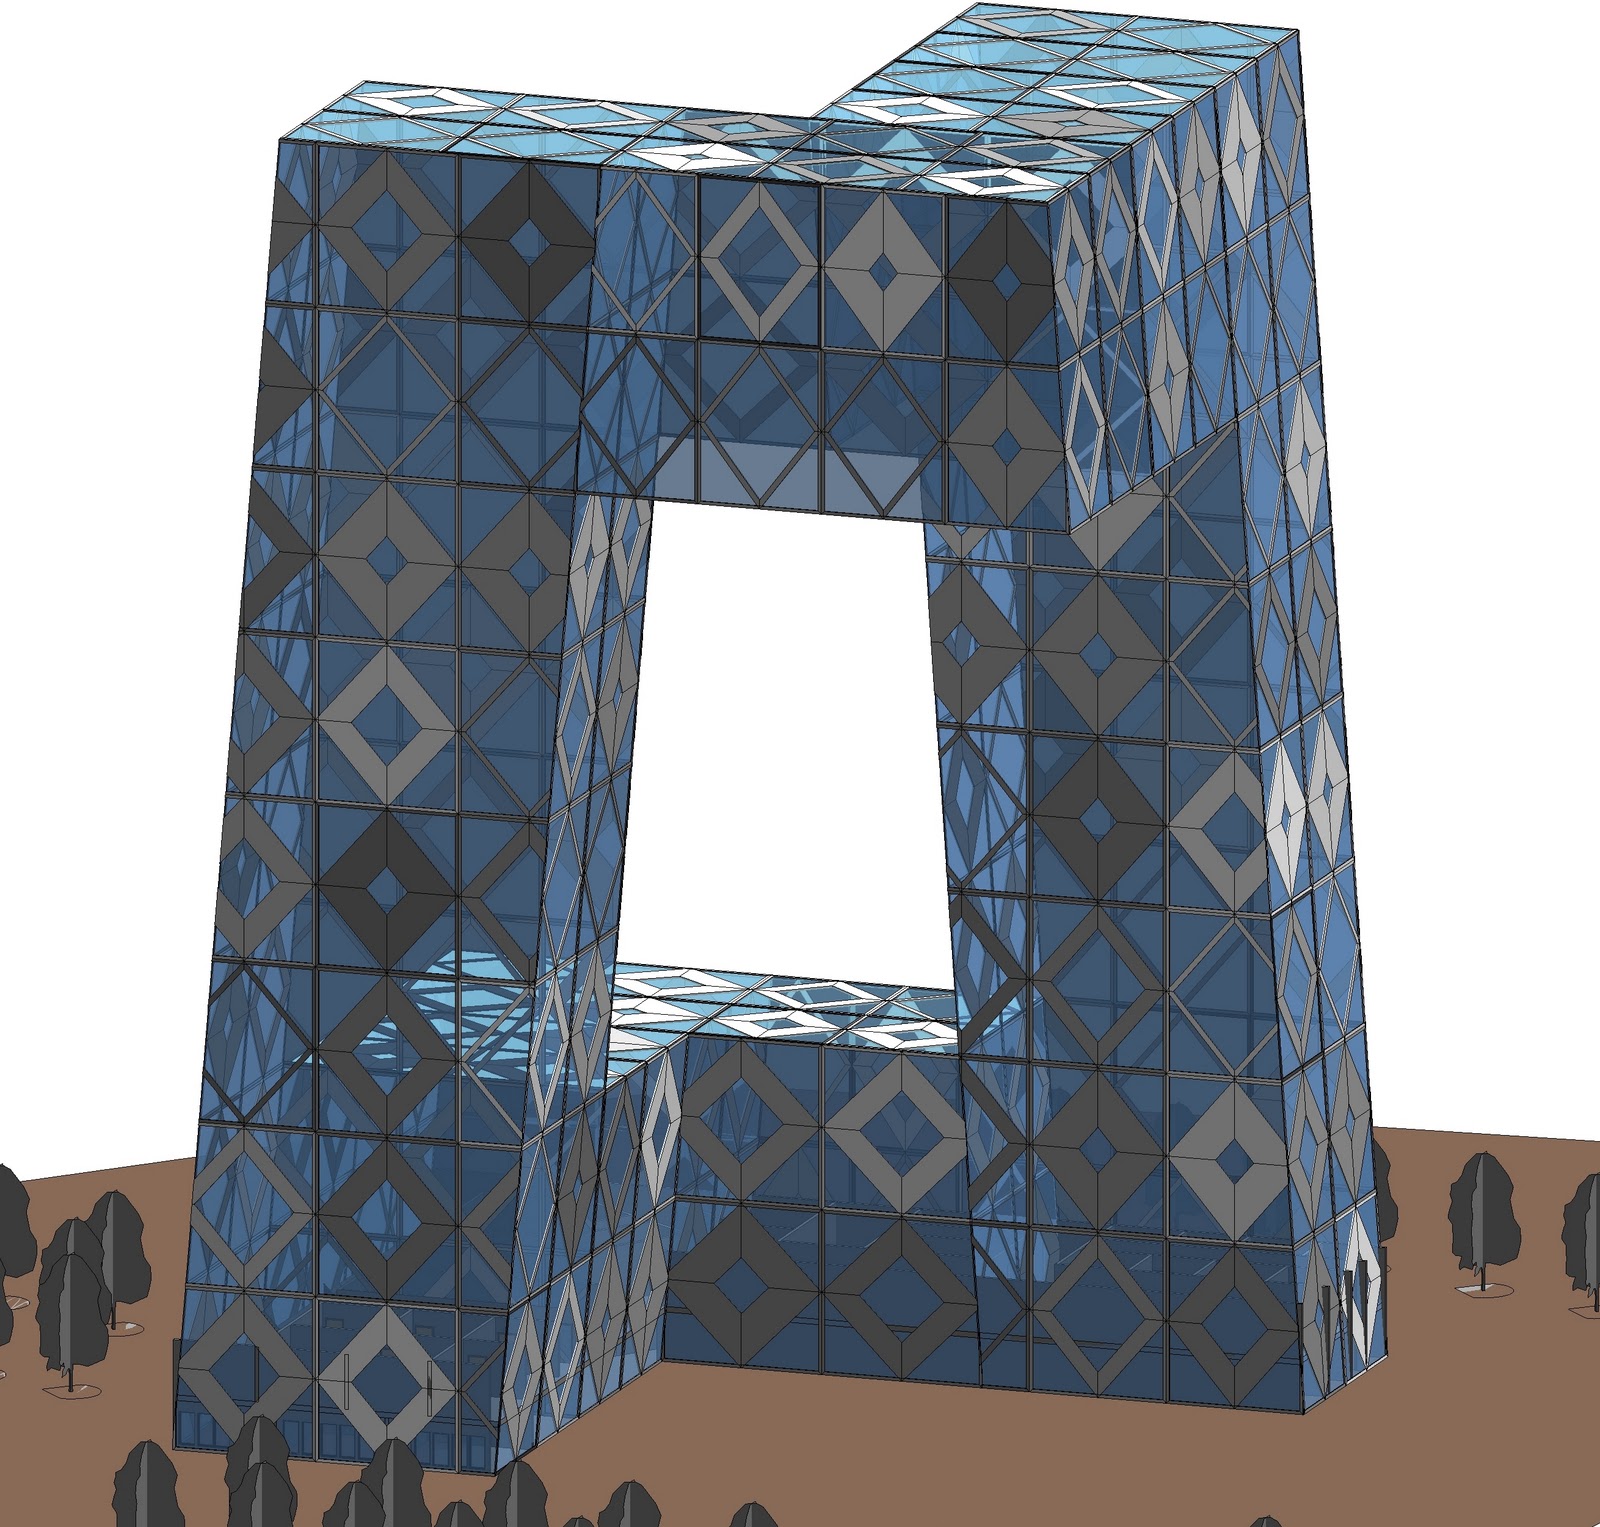
Give the inside frames in the panels random sizes.
Give the inside frames' color a random value of color in a specific range from white to grey.
Give the outside frames' color a random value of color in a specific range from white to grey.
First, we create two materials by asking the Material class , for the two materials that we are going to use further on for our curtain panels.
My goal was to use CSharp to manipulate the parameters in the curtain panel, which I wasn't able to work with only using Revit. my three implementations are :
Give the inside frames in the panels random sizes.
Give the inside frames' color a random value of color in a specific range from white to grey.
Give the outside frames' color a random value of color in a specific range from white to grey.
First, we create two materials by asking the Material class , for the two materials that we are going to use further on for our curtain panels.
-------------------------------------------------------------
//Create the material
ElementId materialId = Material.Create(familyDoc, "My Material" + m);
// adding random m to avoid same names used when running the program multiple times.
material = familyDoc.get_Element(materialId) as Material;
ElementId materialId2 = Material.Create(familyDoc, "My Material_2" + m);
// adding random m to avoid same names used when running the program multiple times.
material2 = familyDoc.get_Element(materialId2) as Material;
-------------------------------------------------------------
Then we specify the curtain panel instances, in an int array named IDS
material2 = familyDoc.get_Element(materialId2) as Material;
-------------------------------------------------------------
Then we specify the curtain panel instances, in an int array named IDS
-------------------------------------------------------------
IDS = new int[] {4105,4106,...,4426};
-------------------------------------------------------------
After that we call the SetLengthAndMaterial function using the two materials and the IDS We will explain the SetLengthAndMaterial function in a short while.
-------------------------------------------------------------
SetLengthAndMaterial(IDS, familyDoc, material, material2);
-------------------------------------------------------------
The function SetLengthAndMaterial does the followings for every ID that it is passed to:
- region 1 : Obtains the parameters "length", "Frame material", and "outframe material".
- region 2 : calculates new values for these parameters
- finds a random number for length from the set of {1, 3, 5, 7} feet.
- fins a random number in the range of [120, 255) and sets it as red, green, and blue elements of the color that will be assigned to both materials
- region 3 : sets the parameters to the calculated values
-------------------------------------------------------------
#region 1 Get instance parameters of the objects
Parameter panelLengthParam = panelInstance.get_Parameter("length");
Parameter panelMaterialParam = panelInstance.get_Parameter("Frame material");
Parameter panelMaterial2Param = panelInstance.get_Parameter("outframe material");
#endregion
#region 2 Calculates new values
int[] random_size = { 1, 3, 5, 7 };
double length = random_size[(byte)random.Next(0, 4)];
byte red = (byte)random.Next(120, 255);
Material myMaterial = material.Duplicate("My Material " + m + "-" + n);
Material myMaterial2 = material.Duplicate("My Material_2 " + m + "-" + n);
myMaterial.Color = new Color(red, red, red);
myMaterial2.Color = new Color(red, red, red);
#endregion
#region 3 Set parameters of objects using new values
panelLengthParam.Set(length);
panelMaterialParam.Set(myMaterial.Id);
panelMaterial2Param.Set(myMaterial2.Id);
#endregion
-------------------------------------------------------------
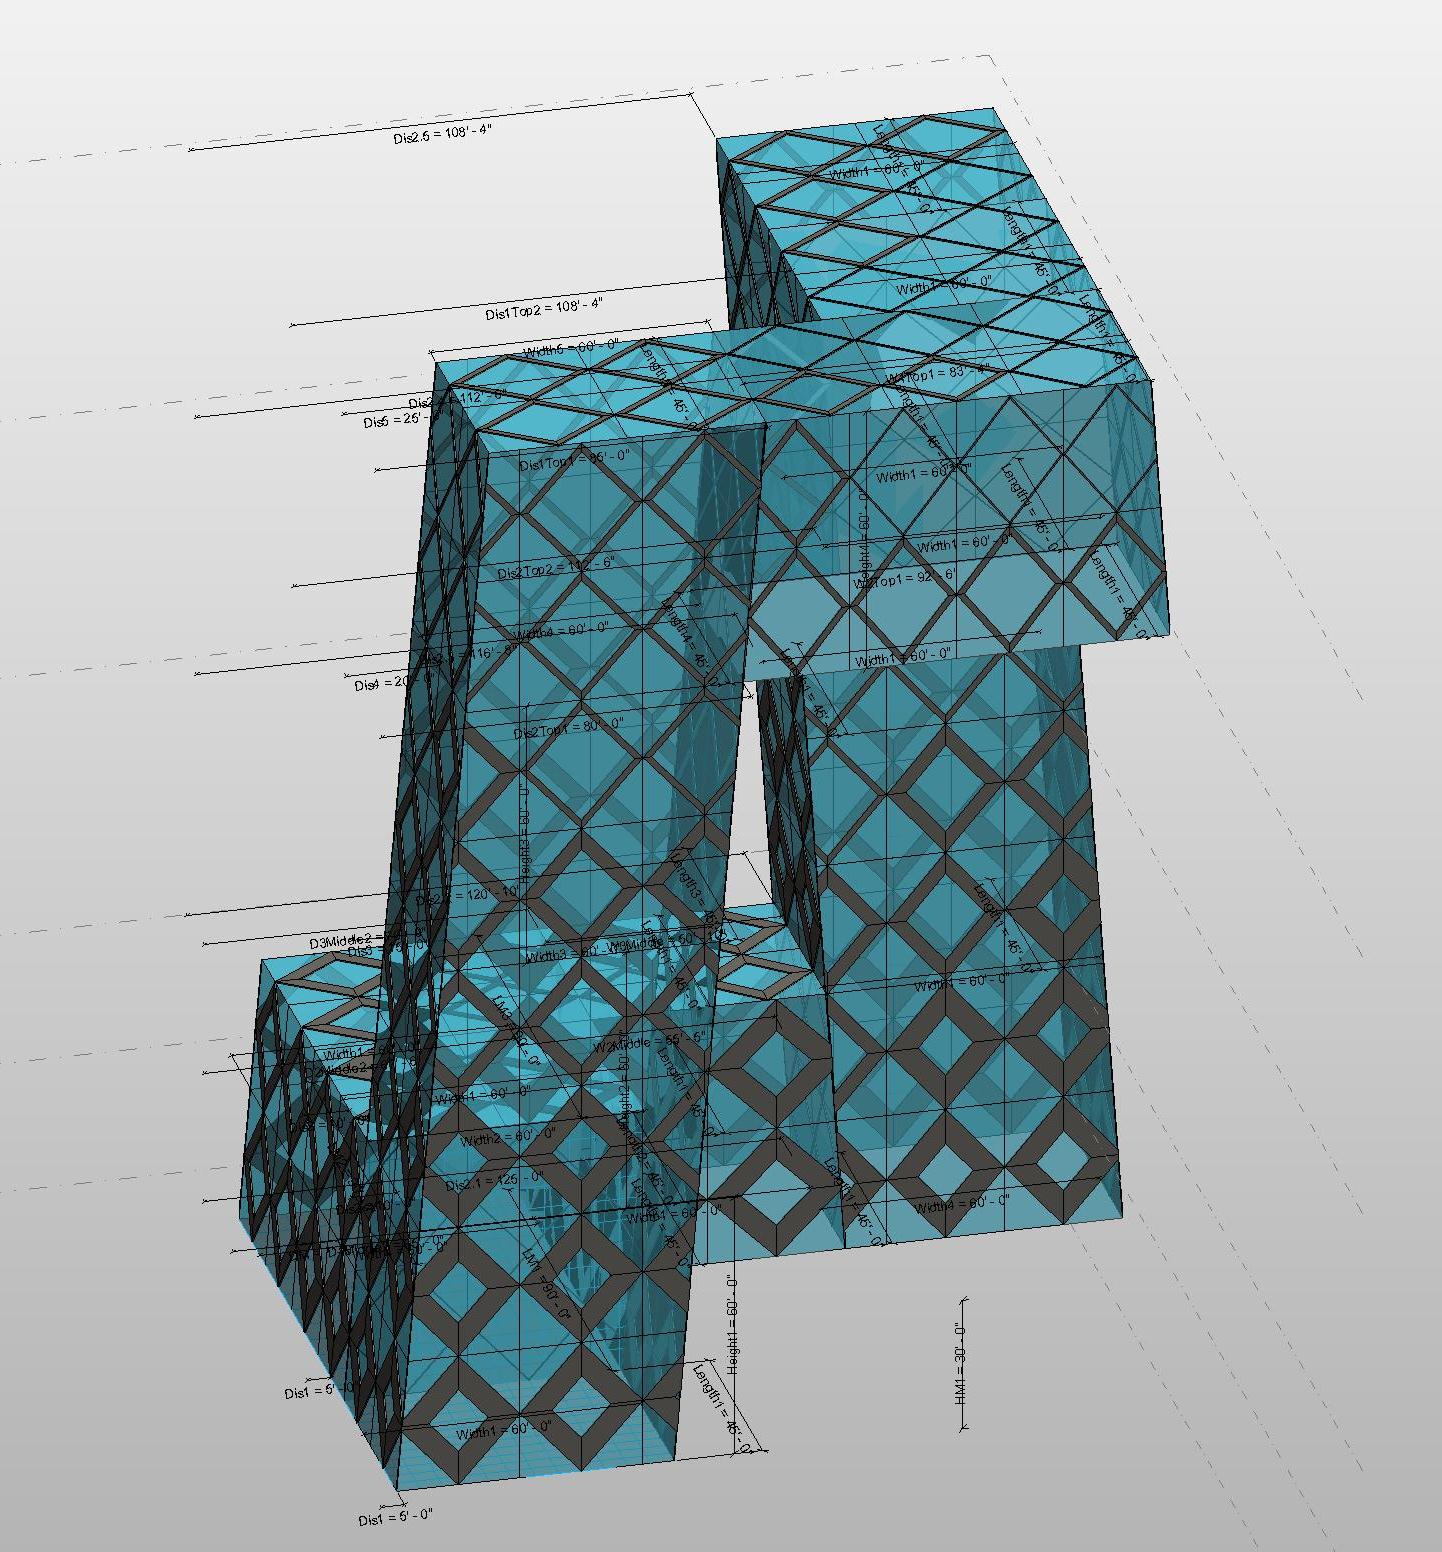
When this code is executed on the project, the outcome is as follows


 |
| SnapShot#1 |
 |
| SnapShot#2 |
 |
| SnapShot#3 |


